

Quick answer
For a smooth, durable cabinet finish, Oller Painting and Coatings recommends thorough degreasing, careful surface preparation, compatible primer and cabinet enamel, and full drying and curing time. A brush and roller can produce excellent results, but matching a sprayed factory finish takes additional equipment and practice.
How long does it take to paint kitchen cabinets?
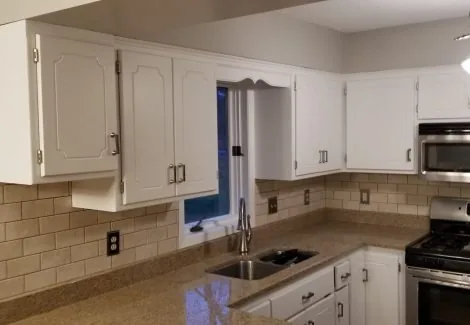
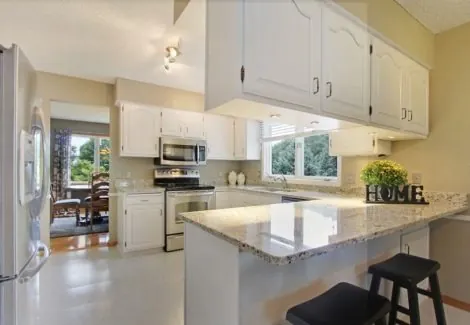
Painting kitchen cabinets is a multi-day project with several stages, long drying and curing times, and a kitchen partly out of service. Product labels set the timing for recoating, handling and returning cabinets to normal use.
Allow time for cleaning, repairs, primer and multiple finish coats. Set up stable supports where doors can lie flat with access around their edges, away from cooking grease, pets and dust. Let each side dry for the specified time before turning, protect the painted surface, and never stack freshly painted doors.
Tools and materials
Painting cabinets requires cleaning supplies, surface preparation tools, compatible coatings and a protected drying area. Choose brushes, rollers and protective equipment according to the coating manufacturers' directions.
- Screwdriver, labeled hardware bags, marker and painter's tape.
- Drop cloths, masking materials and stable door supports.
- Paint-preparation degreaser, clean water, cleaning cloths and gloves.
- Fine abrasive pads or 180 to 220 grit sandpaper, compatible repair filler and optional grain filler.
- Vacuum suitable for the dust, microfiber cloths and eye protection.
- Surface-appropriate primer and cabinet-and-trim enamel.
- Compatible brush, recommended mini roller, tray and label-specified respiratory protection.
Remove and label everything first
Remove cabinet doors, detachable drawer fronts and hardware before painting, and label each part by location. A numbered map makes reassembly easier and keeps hinge positions organized.

- Draw a kitchen map and assign each door and drawer front a number.
- Remove pulls, knobs and hinges, photographing adjustable hardware before disassembly.
- Place numbered tape in a concealed hinge recess that will remain unpainted. Rely on the map if the recess needs coating.
- Bag hardware by location and label each bag.
- Protect counters, appliances and floors, and mask cabinet interiors and adjoining surfaces.
For an integral drawer front, remove the drawer and protect the box. Do not force apart glued components.
How to clean kitchen cabinets before painting
Clean kitchen cabinets with a degreaser intended for paint preparation before sanding or priming. Grease prevents dependable adhesion, and sanding greasy surfaces can spread contamination into scratches.

- Follow dilution and safety directions, and test the cleaner in an inconspicuous spot.
- Scrub profiles, edges, handle areas and surfaces near the stove. Change cloths frequently to remove grease instead of redistributing grease.
- Rinse as directed using clean water and a fresh cloth. Avoid soaking joints, unfinished edges or fiberboard.
- Let surfaces dry fully, inspect for oily patches and repeat cleaning where necessary.
Even a strong bonding primer needs a clean, sound surface. Primer cannot compensate for grease left behind.
Do you have to sand cabinets before painting?
Cabinets commonly need light scuff sanding to dull sound glossy finishes and smooth repairs, depending on the coating system's directions. Removing every trace of the existing finish is usually unnecessary when the finish is sound.

Before disturbing coatings in a home built before 1978, have the coating checked for lead and choose an appropriate lead-safe approach. Ordinary sanding and household vacuuming are unsuitable for handling lead paint dust.
When sanding is appropriate, use fine abrasive pads or 180 to 220 grit paper. Work toward an evenly dull surface, taking care around thin veneer, edges and profiles. Fill dents and damaged edges with compatible filler, then sand flush.
Oak grain remains visible unless filled. For a flatter appearance, use compatible grain filler in the specified application sequence; regular primer cannot replace grain filling. Vacuum dust from corners and profiles, then wipe with barely damp microfiber or an approved tack cloth. Some tack cloths leave residue. Let damp surfaces dry.
What primer to use on oak, laminate and glossy cabinets
Choose cabinet primer for the substrate, existing finish and planned enamel, checking both adhesion and stain-blocking requirements. A primer that bonds well does not necessarily block wood tannins or persistent stains.
- Glossy finishes: Use a bonding primer rated for the prepared surface and compatible with the enamel.
- Laminate: Use a primer specifically rated for laminate. Repair loose material first; paint cannot stabilize a failing surface.
- Oak, knots and persistent stains: Choose a shellac-based or oil-based stain-blocking primer rated for the problem.
Pro tip
Test the complete coating system in a hidden area, following timing and adhesion-check instructions. When primer is ready for sanding, lightly smooth raised fibers and dust nibs, then remove dust.
What paint to use on cabinets, and how to apply it
Common mistake
Wall paint is an unsuitable substitute. Compare satin and semi-gloss in our article on choosing sheen.
- Brush profiles and corners with a brush suited to the enamel. Use a recommended fine foam or microfiber mini roller on flat areas.
- Apply thin coats, checking lower edges and recesses for runs.
- Keep a wet edge and stop brushing once paint begins to set.
- Observe the full recoat interval. Sand between coats only when directions permit, then remove dust.
Spraying requires practice, extensive masking, controlled ventilation and suitable respiratory protection because overspray travels beyond the workpiece. Our cabinet painting service helps when a sprayed appearance is the priority.
How to paint trim and baseboards
Prepare trim and baseboards by cleaning, scuffing suitable surfaces, filling nail holes and smoothing repairs before applying enamel. Prime exposed wood and repairs as needed for the coating system.

Caulk small stationary gaps at the wall with paintable caulk, observing drying instructions. Leave moving joints and door operating clearances free of caulk. Satin or semi-gloss enamel works well; brush with the grain in manageable lengths and cut in carefully against walls. Avoid overloading corners to achieve coverage in one pass.
Painting cabinets in a Minnesota winter
Winter cabinet painting requires air and surface temperatures within product limits throughout application and drying, plus label-specified ventilation. A cold Minnesota garage can fall below those limits even when the adjoining house feels warm.

At Oller Painting and Coatings, our crews account for work-area conditions when planning cabinet painting across Minneapolis, St. Paul and the suburbs. Closed windows complicate ventilation, while dry indoor air and forced-air heat can change how quickly paint sets under the brush. Follow ventilation and ignition precautions for oil-based and shellac-based primers.
Dry to the touch does not mean cured. Follow handling and rehanging instructions, and allow the specified cure time before heavy use or cleaning.
Common mistakes
Common cabinet-painting shortcuts cause poor adhesion, bleed-through, sags and handling marks. Extra drying time cannot correct poor preparation.
- Skipping degreasing: Clean thoroughly before sanding.
- Skipping necessary primer: Match adhesion and stain control to the surface.
- Applying thick coats: Use thin coats and observe recoat intervals.
- Overbrushing setting paint: Maintain a wet edge, then let enamel level.
- Handling too soon: Follow label timing to prevent hinge marks, sticking edges and damaged contact points.
How to tell it is done right
A properly finished cabinet has even coverage, clean edges and working hardware after the required drying time. Visible oak grain alone does not indicate failure when grain filling was omitted.

- Check angled light for runs, heavy brush ridges and trapped debris.
- Look for consistent sheen and no stain bleed-through.
- Check door alignment, drawer movement and clear contact points.
- Confirm cure time before normal cleaning or heavy use.
Frequently asked questions
How do you clean kitchen cabinets before painting?
Clean cabinets with a degreaser made for paint preparation before sanding, paying extra attention around the stove and handles. Check the label on your product for dilution, rinsing and safety directions, then let surfaces dry fully and repeat cleaning wherever grease remains.
How do you hide oak grain when painting cabinets?
Use a grain filler compatible with your primer and cabinet enamel to reduce visible oak grain. Regular primer will not fill the grain, so check the label on your product for the application sequence and drying instructions before priming and painting.
Can you paint cabinets with a roller and get a smooth finish?
You can get a smooth cabinet finish with careful preparation, a suitable brush and a fine foam or microfiber mini roller recommended for your enamel. Apply thin coats and avoid working paint that has begun to set, though matching a sprayed factory finish takes more equipment and practice.
How long should cabinet paint dry between coats?
Wait the full recoat interval specified by the manufacturer, even if the cabinet paint feels dry to the touch. Check the label on your product before recoating, rehanging doors or cleaning, because drying enough for another coat is different from curing enough for normal use.
Can you paint kitchen cabinets in winter in Minnesota?
Yes, if you can maintain the required air and surface temperatures and provide suitable ventilation throughout application and drying. A cold garage may fall below application and curing limits, so check the label on your product for temperature requirements, ventilation directions and ignition precautions.
When to call a pro
Want a smooth cabinet finish without taking on the preparation yourself? Show us your kitchen at a free estimate. Explore cabinet painting.
We can discuss cabinet condition, kitchen access and the finish you want.